
Tub-to-Shower Conversion Ideas: What to Plan Before You Remodel
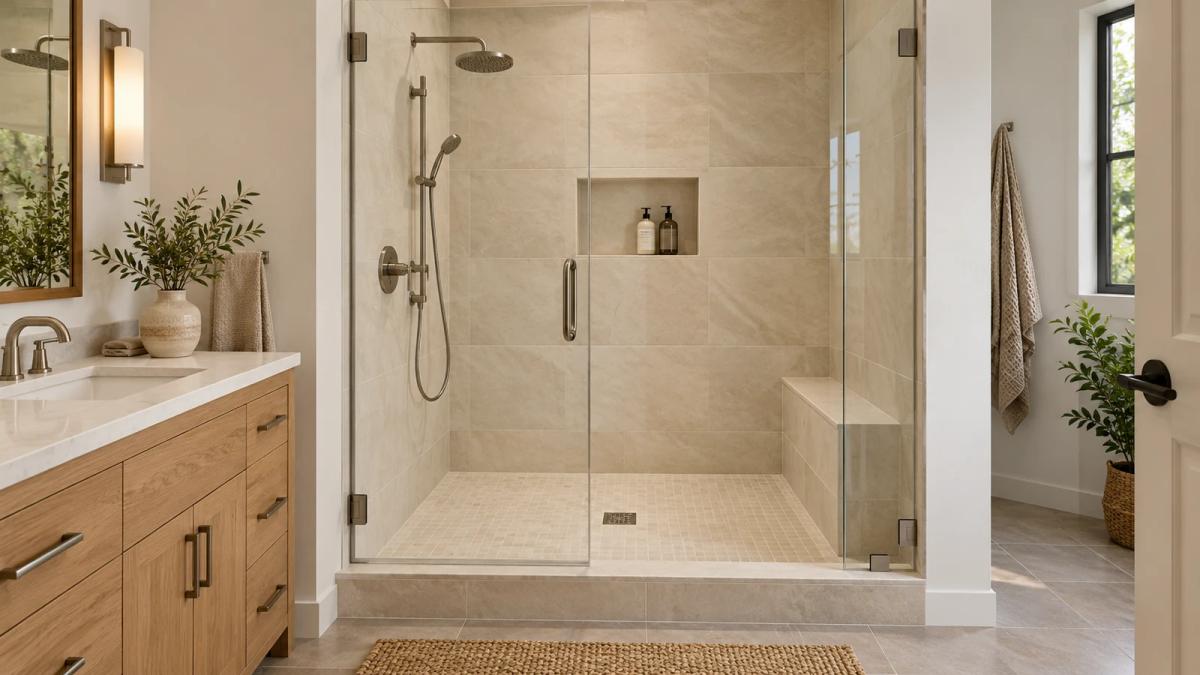
The best tub-to-shower conversion ideas solve a problem you notice every day. That might be stepping over the tub, finding room for shampoo or cleaning an awkward enclosure.
Start with those frustrations, then choose the entry, seating, storage, glass and wall finishes together. A shower can look spacious in a photo while leaving too little room to turn or reach the controls.
For Tampa Bay homeowners, the existing bathroom matters as much as the inspiration. The floor structure, plumbing and surrounding finishes help determine which ideas fit your project.
Key Takeaways
- Keeping the existing tub area can focus the project, but it doesn't guarantee unchanged plumbing or flooring.
- A low threshold and a curbless entry are different designs with different planning needs.
- Compare the complete shower scope, including preparation, waterproofing, glass, storage and surrounding repairs.
1. Keep the Tub Alcove and Make the Shower Feel More Open
An alcove shower uses the space between the three walls surrounding an existing tub. It's a useful starting point when the vanity, toilet and main bathroom layout already work.
Picture pale wall tile, a simple shower base and clear glass across the opening. Keeping the finishes coordinated can make the shower feel connected to the room.
Measure the usable space inside the finished shower, including any bench or projecting shelves. Replacing a tub doesn't automatically enlarge the bathroom or create more room beside the vanity.
Scope question: Will the new shower fit the existing opening, or will nearby walls and flooring need changes?
Also ask whether the selected base works with the existing drain location. Keeping the shower in the same place doesn't establish that every plumbing connection can stay.
2. Choose the Entry Before You Choose the Floor Tile
A low-threshold shower has a raised edge you step over. A curbless shower has no raised curb at the entrance.
Either can be worth exploring, but a curbless design needs more than removing the tub and choosing a flat-looking base. The floor heights, slope, drainage and waterproofing must work together.
Schluter's curbless shower planning guidance explains why that coordination starts beneath the finished tile.
If your bathroom sits on a concrete slab, ask how the proposed shower will meet the surrounding floor. A qualified contractor should evaluate the structure and plumbing before promising a flush entry.
Scope question: Does the proposal include changes to the bathroom floor or doorway transition, or only the shower area?
A curbless entry alone doesn't make a shower ADA compliant. If you need wheelchair access or help from a caregiver, discuss the entire route and bathing routine.
3. Plan a Seat, Handheld Shower and Controls as One Arrangement
A seat is useful only when you can comfortably reach what you need from it. Choose its position alongside the controls, handheld shower and storage.
A built-in bench creates a permanent place to sit, but it occupies part of the shower floor. A folding seat may preserve more standing room when raised.
Compare both ideas in the measured layout. Think about how you enter, sit, stand and reach a towel afterward. A narrow footrest for shaving serves a different purpose from a bathing seat.
Scope question: What support, waterproofing and fixture placement does the chosen seat require?
Discuss grab bars before the walls are finished, too. Their locations should suit the person using the shower. Don't treat a towel bar or glass-door handle as a substitute.
4. Size a Recessed Niche Around the Products You Use
A niche is a shelf recessed into the shower wall. It keeps bottles off the floor without projecting as far as a surface-mounted shelf.
Start with your actual bottles, including pump tops. A divided niche can separate taller containers from soap and smaller items. Position it where you can reach it comfortably.
The available wall space matters. Plumbing, framing and the wall assembly can limit where a niche belongs or how wide it can be.
Scope question: Are the niche size, shelf, finished edges and waterproofing included in the proposal?
Avoid choosing its location from a tile pattern alone. The recess and its connection to the surrounding wall need to be part of the waterproofing design.
5. Match the Glass to the Space Outside the Shower
Choose glass by testing the opening, not just its appearance. A hinged door needs room to swing without colliding with nearby fixtures or the bathroom door.
A sliding enclosure avoids that outward swing, but the available entry opening still needs checking. A fixed glass panel can create an open entrance, with splash containment planned around the layout.
Clear glass keeps the tile visible. Obscure glass offers another option when privacy matters. Either choice still needs a cleaning routine for the glass and hardware.
Scope question: Which enclosure, opening width, hardware and installation details are included?
Walk through where you'll stand to turn on the water and where you'll step out. Include the bath mat and towel location. A comfortable shower entrance needs usable space on both sides.
6. Choose Shower Walls for Appearance and Everyday Care
Tile gives you choices in color, scale and pattern. Wall panels offer another way to create a stone or tile look with fewer grout joints.
Compare samples with the vanity and bathroom floor you plan to keep. A quiet wall finish can work well when the existing room already has a strong pattern.
Ask to see corners, panel seams, niche edges and the connection to the base. Those details are part of the finished appearance, too.
Scope question: Which wall system, trim, preparation and care requirements does the proposal include?
Fewer grout joints doesn't mean no maintenance. Read the selected manufacturer's cleaning instructions before committing. Tile and grout also don't replace the waterproofing assembly behind them.
Schluter's tiled-shower waterproofing overview explains that distinction. The visible finish and the water-management system have separate jobs.
A TGA Shower Design Example in St. Petersburg
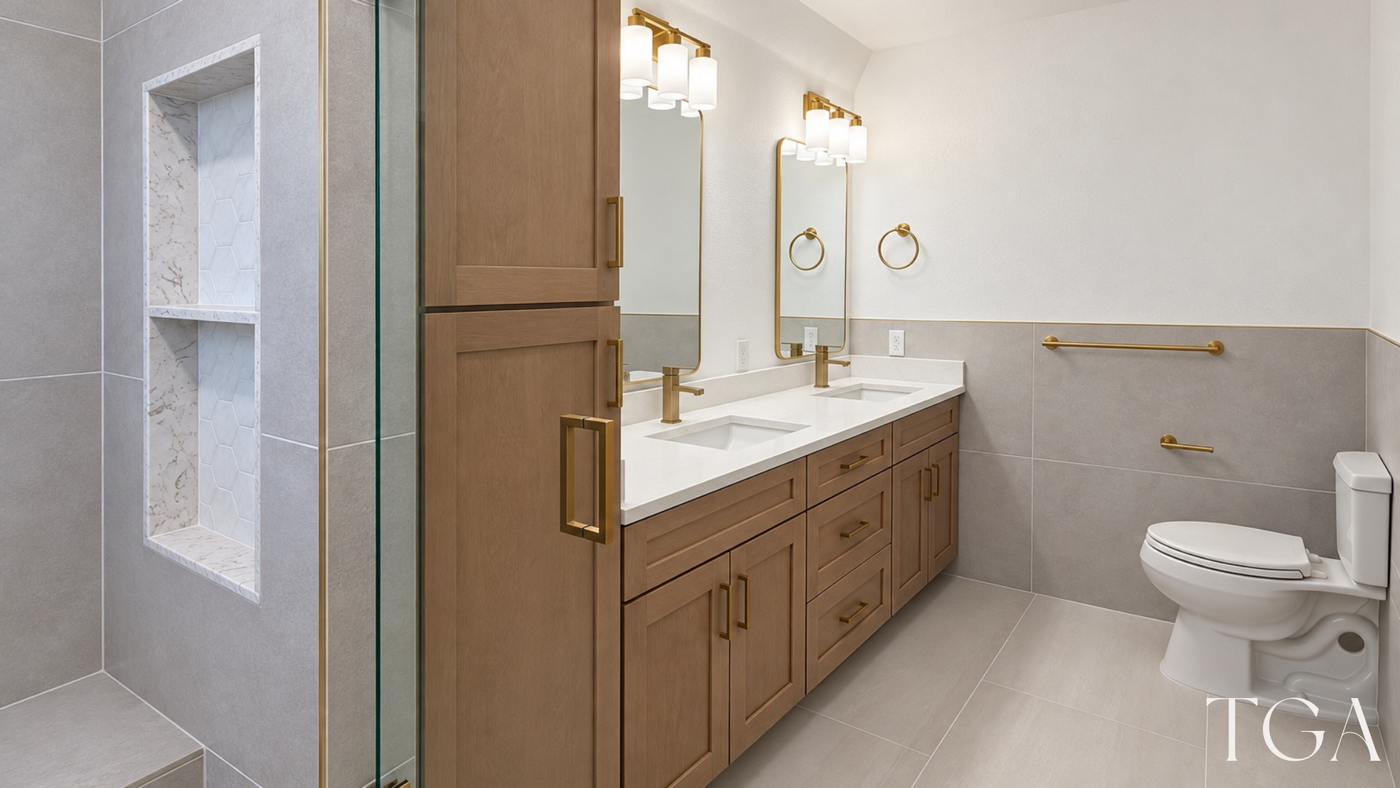
Our Wood & Brushed Gold Bathroom Remodel in St. Petersburg brings several of these features together. The shower includes a built-in bench, a divided recessed niche and clear glass.
White horizontal wall tile, larger gray side-wall tile and small white hexagon floor tile give each surface a distinct role. Brushed gold details connect the shower with the wood-tone vanity.
Use this project as a shower design example. It isn't presented here as a documented tub-to-shower conversion.
The useful question is which features would serve your bathroom, and how much space each one would need.
Should You Remove the Only Bathtub?
Decide that before finalizing the shower design. Think about who uses the bathroom now and who may use it later.
Does anyone regularly take baths? Do you use the tub to bathe children? Would another bathroom meet those needs?
If selling soon is part of your plan, discuss buyer expectations with a local real estate professional. There's no single resale result you can assume for every home.
A shower may better suit your daily routine. Keeping a tub can also be the right decision when it serves a real household need.
Compare What Each Conversion Quote Actually Includes
Two proposals can show similar finished showers while covering different work. Use this checklist to compare the same intended result:
- Removal and preparation: What comes out, what remains and how are the surrounding finishes protected?
- Existing conditions: How will concealed damage or unsuitable backing be documented, priced and approved if discovered?
- Plumbing: Which drain, valve and supply connections are included? What changes with your selected fixtures?
- Waterproofing: What system is specified, and how does it address the base, walls, niche, bench and entrance?
- Selections: Are the base, wall finish, glass, fixtures and accessories specified, or are some still allowances?
- Finishing: Who handles affected flooring, drywall, paint and trim outside the shower?
- Coordination: Who confirms applicable permits and inspections? When will the bathroom be unavailable, and what could affect that schedule?
Ask for unanswered items to be clarified before approving the proposal. A material allowance is money reserved for a selection. It isn't confirmation of the exact product you'll receive.
Plan Your Shower Around Your Home
Bring photos of your bathroom and a few favorite shower ideas to your first conversation with TGA Kitchens & Remodeling. Tell us what each idea would improve for you.
Start with a free in-home TGA 5-Star Estimate for your Tampa Bay home. We'll review the space, your priorities and the proposed scope so you can compare your options clearly.