Luxury Vinyl Plank Flooring Guide: Expert Tips for Choosing, Installing, and Maintaining Durable Floors
Luxury Vinyl Plank Flooring Guide: Expert Tips for Choosing, Installing, and Maintaining Durable Floors
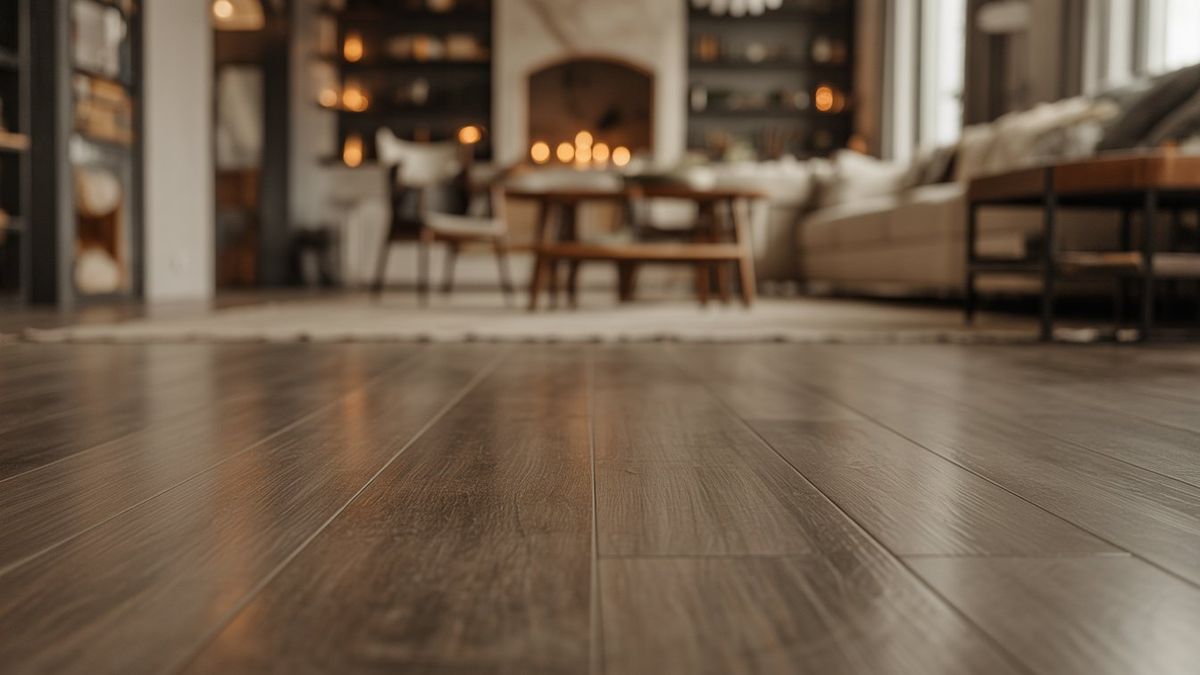
Luxury vinyl plank flooring gives you the look of real hardwood with extra durability and water resistance. It handles daily wear, moisture, and heavy traffic without the high cost or endless upkeep of natural wood.
We choose luxury vinyl plank when you want a waterproof, low-maintenance floor that combines realistic wood visuals with long-term performance at a practical price. Modern LVP uses layered construction, protective wear layers, and advanced printing to create surfaces that stand up to pets, spills, and busy households.
In this guide, we break down how it works, what to look for, and how to decide if it fits your space. You'll get a sense of installation options, style choices, and the key specs that affect durability and comfort.
Key Takeaways
- Luxury vinyl plank uses layered construction and a protective wear layer for durability and water resistance.
- You can pick from multiple styles, finishes, and installation methods to match your space and budget.
- Good selection and basic maintenance help your floor last and keep its value.
Understanding Luxury Vinyl Plank Flooring
Luxury vinyl plank flooring combines layered construction , realistic surface design, and practical durability. Before picking a product, it's worth understanding how it differs from other vinyl formats and what each layer actually does.
What Sets Luxury Vinyl Plank Apart
Luxury vinyl plank (LVP) is a type of luxury vinyl flooring (LVF) designed to look like hardwood in plank form. Manufacturers use high-res imaging and textured embossing to create grain patterns, knots, and matte finishes that feel surprisingly close to real wood.
Modern LVP uses rigid or semi-rigid cores that boost stability. Many products feature click-lock systems, so you can float the floor without glue.
This makes installation much easier and perfect for renovations. LVP holds up well in moisture-prone areas.
Most products are fully waterproof, so you can put them in kitchens, bathrooms, basements, and laundry rooms. Compared to solid hardwood, LVP needs less maintenance and shrugs off scratches and dents, especially with a thicker wear layer.
Key Components and Layers
Luxury vinyl plank flooring uses a multi-layer structure. Each layer has a specific job that impacts durability, comfort, and how long the floor lasts.
Typical layers include:
- Wear layer Clear, protective coating measured in mils (like 12 mil or 20 mil). Thicker wear layers fight off scratches and scuffs better.
- Design layer Printed film that creates the wood-look.
- Core layer Usually SPC (stone plastic composite) or WPC (wood plastic composite). This layer adds rigidity, impact resistance, and keeps the plank stable.
- Backing layer Balances the plank and sometimes includes underlayment for sound reduction.
Pay close attention to wear layer thickness when comparing products. Residential spaces usually do well with 12-20 mil, while commercial or high-traffic areas might need thicker protection.
Core type also matters, it affects how the vinyl plank handles temperature swings and subfloor imperfections.
Differences Between LVP, LVT, and Sheet Vinyl
LVP and LVT both fall under luxury vinyl flooring, but they differ in format and what they’re meant to look like.
- LVP (Luxury Vinyl Plank): Mimics hardwood and comes in plank-shaped boards.
- LVT (Luxury Vinyl Tile): Mimics stone or ceramic and comes in tile-sized pieces.
- Sheet vinyl: Sold in wide rolls, installed in big sheets with few seams.
Both LVP and LVT use layered construction and usually offer click-lock or glue-down options. They give you more realistic visuals and thicker wear layers than basic sheet vinyl.
Sheet vinyl is cost-effective and water-resistant, but it’s usually thinner and lacks detailed texture. If you want defined plank or tile visuals with extra durability, LVP or LVT are usually the way to go.
Core Technologies and Construction
Luxury vinyl plank flooring relies on its core layer for stability, water resistance, and long-term performance. Let's take a look at how SPC, WPC, and other core types differ in structure, feel, and use cases so you can pick the right product for your space.
SPC: Stone Plastic Composite Explained
SPC stands for Stone Plastic Composite . Manufacturers mix limestone powder with polyvinyl chloride (PVC) and stabilizers to form a dense, rigid core.
We install SPC where strength and moisture control matter most. The high mineral content keeps the plank stable, so it doesn't expand and contract much with temperature changes.
Typical SPC construction includes:
- UV-coated wear layer
- Printed vinyl design layer
- SPC rigid core
- Attached underlayment (usually foam)
SPC flooring feels firm underfoot. It resists dents better than many flexible products, which is great for kitchens, basements, and light commercial spaces.
Brands like COREtec , CALI Vinyl , and Mannington Adura Max offer rigid core vinyl lines that use SPC technology in some collections. We recommend SPC when you need a thinner plank that can handle subfloor imperfections and heavy traffic without losing its waterproof qualities.
WPC: Wood Plastic Composite Benefits
WPC stands for Wood Plastic Composite . A WPC core blends PVC with wood flour or similar stuff plus foaming agents to create a thicker, lighter core.
WPC flooring feels softer and warmer underfoot than SPC. The foamed structure adds cushioning and absorbs sound, which helps in upstairs rooms and apartments.
Standard WPC construction includes:
- Protective wear layer
- Decorative vinyl layer
- WPC core
- Attached cork or foam backing
Many early rigid core products, including some COREtec lines, used WPC cores for comfort and built-in underlayment. We often pick WPC if comfort and sound reduction matter more than maximum dent resistance.
WPC planks are usually thicker than SPC. That extra thickness can help cover minor subfloor bumps, but you might need to trim doors or adjust molding during installation.
Rigid Core and Flexible Core Comparison
Rigid core vinyl covers both SPC and WPC flooring . Flexible core vinyl uses solid PVC without a dense composite center.
We use rigid core vinyl when we want better dimensional stability. SPC and WPC both handle moisture better than old-school flexible LVP.
Key differences:
Flexible vinyl can work in small, climate-controlled spaces. Still, we usually rely on rigid core construction for most modern installs since it makes floating floors easier and improves long-term results.
When comparing brands like COREtec, CALI Vinyl, and Mannington, we focus on core composition, wear layer thickness, and total plank build, not just the marketing.
Surface Finishes and Wear Layer Performance
Surface finish and wear layer quality decide how well luxury vinyl plank stands up to traffic, spills, and daily abuse. We look at measurable factors like wear layer thickness, protective coatings, and texture technology to judge long-term performance.
Wear Layer Thickness and Durability
The wear layer is the clear, top protective layer that shields the printed design from scratches, stains, and wear. Thickness, measured in mil (1 mil = 0.001 inch), directly impacts durability.
For homes, we usually suggest:
- 6-8 mil: Light traffic areas like bedrooms
- 12 mil : Most rooms, including living spaces and kitchens
- 20 mil or higher : Heavy residential or light commercial use
A thicker, tough wear layer shrugs off dents and surface damage better. But thickness alone doesn’t guarantee quality.
Manufacturing standards, core stability, and coating technology also matter. We prefer matching wear layer thickness to traffic level instead of just picking the thickest plank.
Urethane and Enhanced Coatings
Most modern LVP uses a urethane coating over the wear layer. This clear finish boosts scratch resistance and makes cleaning easier.
Standard urethane protects against daily abrasion. Enhanced versions, reinforced with ceramic bead or aluminum oxide, give you a tougher finish for busier spaces.
Key perks of advanced urethane coatings:
- Improved stain resistance
- Easier scuff removal
- No need for waxing or polishing
- Better long-term gloss
We like multi-layer coating systems in premium products. A quality urethane coating helps the wear layer by stopping surface damage before it gets deeper.
Scratch Resistance and Embossed Textures
Scratch resistance depends on both wear layer thickness and surface finish tech. Even the best floor will show damage under heavy force, but good LVP hides marks from pets, furniture, and daily foot traffic.
Texture also matters. Embossed-in-register (EIR) technology lines up surface texture with the printed wood grain, so the plank feels as real as it looks.
These textures aren’t just for show. Light embossing helps hide small scratches and scuffs by scattering light across the surface.
We suggest checking planks under direct light to see how deep the texture is and how clear the finish looks. Realistic textures plus a solid wear layer make flooring that keeps its looks even with regular use.
Types, Styles, and Visual Options
Luxury vinyl plank flooring comes in a huge range of visuals, textures, and plank formats. You can match just about any design style if you pick the right look, finish, and size.
Wood-Look and Stone-Look LVP
Wood-look LVP is the top choice because it mimics hardwood without the hassle. We often use it in living rooms, kitchens, and basements where moisture resistance is a must.
It mimics oak, maple, hickory, walnut, and even exotics using high-res imaging layers. Manufacturers now create wood visuals with detailed grain and color variation across planks.
Many lines offer distressed, hand-scraped, or wire-brushed designs to follow current hardwood trends.
Stone-look LVP gives you the look of slate, marble, travertine, or concrete in a warmer, softer format. It’s still vinyl, but these planks or tiles provide the style of stone without cold floors or grout headaches.
We usually suggest stone-look LVP for bathrooms, laundry rooms, and entryways where water resistance and durability matter most.
Realistic Wood Appearance and Textures
Modern LVP really leans into realistic wood appearance and tactile detail. Printed design layers now use high-def imaging to capture knots, grain flow, and color shifts you’d find in real wood.
Embossed-in-register (EIR) technology matches surface texture to the printed grain, so when you run your hand over the plank, you feel the grain right where you see it.
This makes textures much more convincing and cuts down that fake vinyl feel. Common texture options:
- Wire-brushed for subtle grain
- Hand-scraped for a slightly uneven, rustic surface
- Smooth matte for a clean, modern look
Rigid core formats add stability, while flexible LVP bends a bit and works best over smooth subfloors. Texture depth and plank thickness both affect how “real” the floor feels underfoot.
Popular Colors, Plank Sizes, and Trends
Color sets the mood for a room. We see a lot of demand for:
- Light natural oak for open, airy vibes
- Warm medium browns for classic looks
- Cool gray and greige for modern spaces
- Deep espresso or charcoal for bold contrast
Wide and long planks are hot right now since they minimize seams and create a more seamless floor. Standard widths run 6 to 9 inches, with lengths from 48 to 72 inches.
Narrow planks and parquet-inspired layouts are making a comeback in some renovations. Some lines even offer mixed-width planks for extra variety.
Low-gloss and matte finishes are everywhere because they hide scratches and don’t bounce light all over the place. There’s also more interest in subtle color variation within each plank for a more natural look.
Installation Methods and Preparation
Luxury vinyl plank (LVP) installs in several ways, and each method affects cost, durability, and subfloor needs. We focus on picking the right system, prepping the surface properly, and figuring out when to DIY or call a pro.
Click-Lock Floating Installation
Click-lock installation creates a floating floor . The planks connect to each other, not the subfloor.
We angle and press each plank into place. The locking edges snap together, forming a tight seam, no adhesive needed.
Most click-lock systems come with an attached pad for cushioning and basic sound insulation. If not, we’ll put down a separate underlayment that the manufacturer approves to boost comfort and help with minor subfloor flaws.
Common tools we use:
- Utility knife for scoring and cutting planks
- Tapping block to tighten seams
- Rubber mallet
- Spacers for expansion gaps
We always leave a small expansion gap around walls and fixed objects. This lets the floor shift with temperature changes.
Click-lock floating installation often lowers installation cost because it moves quickly and doesn’t need adhesives or long curing times.
Glue-Down and Peel-and-Stick Options
Glue-down installation means we secure each plank directly to the subfloor with adhesive. We spread the recommended glue with a notched trowel and set planks carefully, keeping rows straight and tight.
This method works well in large or high-traffic areas. It limits plank movement and gives a firmer feel underfoot, which some folks like better than a floating floor.
Peel-and-stick planks have pre-applied adhesive on the back. We peel off the protective film and press each plank firmly onto a clean, smooth surface.
It’s a simpler process, but you’ve got to get placement right since repositioning is tough. Glue-down systems usually need more subfloor prep and can cost more due to labor and adhesive.
They often work best in commercial spaces or rooms with heavy furniture.
Underlayment, Acclimation, and Subfloor Preparation
Proper subfloor preparation makes a big difference in how long your luxury vinyl plank flooring lasts. We make sure the subfloor is clean, dry, and level before starting.
For concrete, we test for moisture and patch low spots with a leveling compound. For wood, we tighten loose panels and sand down high seams.
Most manufacturers set clear flatness standards over a set distance. We don’t skip those.
We let the planks acclimate by storing unopened cartons in the installation space for 24 to 48 hours. This helps the planks adjust to the room’s temperature and humidity.
Underlayment depends on the product:
- Planks with an attached pad usually don’t need anything extra.
- In multi-level homes, extra sound insulation can help.
- Over concrete, a moisture barrier might be required.
Skipping these steps can lead to gaps, movement, or uneven wear. It’s just not worth the risk.
Professional Installation vs. DIY Tips
We can install click-lock LVP ourselves if we follow instructions and use the right tools. Straight layouts in square rooms are less tricky.
Before starting, we measure the space, figure out waste (usually 5-10%), and plan plank direction. We stagger end joints for strength and looks, and we avoid narrow slivers along walls by adjusting the first row.
Professional installation makes sense when:
- Subfloors need lots of leveling
- We go with glue-down installation
- The layout has lots of angles or transitions
Hiring a pro costs more upfront, but it can cut down on mistakes and save time. Whether we do it ourselves or hire out, careful planning, precise cutting, and attention to expansion gaps are critical.
Performance, Maintenance, and Buying Considerations
Luxury vinyl plank holds up in busy homes. It resists wear, blocks moisture, and feels comfortable underfoot.
We look at durability , waterproof construction, sound control, and practical buying steps before picking a product or brand.
Durability in High-Traffic and Moisture-Prone Areas
We judge durability by wear layer thickness, core construction, and surface coating . For high-traffic areas like kitchens and hallways, a wear layer of 12-20 milworks for most homes.
If you have pets or heavy use, 20 mil or higher is better. Manufacturers add protective finishes to fight scratches and stains.
Brands like Shaw, Mohawk (including SolidTech), Karndean, LifeProof, and SmartCore all offer lines built for daily wear in active homes.
In bathrooms, laundry rooms, and basements, we care about core stability. Rigid cores like SPC (stone plastic composite) fight dents and limit expansion and contraction.
We install expansion gaps and hide them with baseboards or quarter round. That helps prevent buckling and keeps the floor performing well.
We also check the warranty , especially for coverage on wear, staining, and water exposure. Clear, written terms from known brands give us confidence in the product.
Waterproof and Moisture-Resistant Features
A lot of products claim to be waterproof flooring . The core and locking system matter most.
A true waterproof core, usually SPC or WPC, stops water from getting inside the plank. Still, we treat the whole floor system as a unit.
Water can sneak through seams or around the edges if we don’t seal things up or keep expansion gaps. Quick cleanup of spills protects the subfloor, even if the planks themselves resist water.
Moisture resistance changes based on the installation method. Floating click-lock systems are popular because they’re easier to install and avoid adhesive-related moisture issues.
For below-grade spaces, we test concrete for moisture and use a manufacturer-approved underlayment if needed.
We check for low VOC certifications to keep indoor air quality healthy, especially in closed rooms. Good manufacturers share emissions data and FloorScore or similar compliance.
Noise Reduction and Comfort Underfoot
Luxury vinyl plank feels softer than tile or hardwood thanks to its layered build. Some products have pre-installed foam or cork backing for extra comfort and sound reduction.
In multi-level homes or condos, we check IIC and STC ratings when available. Higher numbers mean better sound control between floors.
Adding an acoustic underlayment can help even more. SPC cores feel firmer, while WPC cores give a bit more cushion.
We match the core type to the room’s use. In living rooms and bedrooms, comfort often matters more than dent resistance.
Subfloor prep affects sound too. We level uneven areas and clear out debris to avoid hollow spots or clicking noises later.
How to Choose and Where to Buy
We start by figuring out what the room needs: traffic, moisture, and subfloor condition. Then we compare wear layer thickness, core type, plank size, finish texture, and warranty terms .
Ordering flooring samples is a must. We check color, texture, and plank variation in the actual room lighting.
We lay samples next to cabinets, walls, and furniture before committing. Big retailers like Home Depot carry brands such as LifeProof.
Specialty stores and regional suppliers may stock Shaw, Karndean, Mohawk SolidTech, and other premium lines. Some folks still go to stores formerly known as Lumber Liquidators (under new branding) for budget options.
We always confirm stock, return policies, and installer credentials before buying. The best luxury vinyl plank for us balances durability, waterproofing, realistic design, low VOCs, and a solid warranty from a reputable source.
Frequently Asked Questions
Choosing the right specs and installation approach really determines how luxury vinyl plank performs long-term.
We focus on thickness, wear layers, subfloor prep , layout rules, and brand comparisons. These directly affect durability, stability, and looks.
How do I choose the right thickness and wear layer for my room’s traffic level?
We look at both overall plank thickness and wear layer thickness, measured in mils. For low-traffic rooms like bedrooms, a 4-5 mm plank with a 12 mil wear layer usually does the trick.
For main living areas, kitchens, and hallways, at least 5-6 mm thick with a 20 mil wear layer is better. If it’s a light commercial space or a very busy home, 20-28 mil wear layers hold up best.
Thicker planks help hide minor subfloor flaws and feel sturdier. Still, it’s the wear layer, more than the total thickness, that protects the surface.
What are the most common mistakes to avoid when installing plank flooring?
Skipping acclimation is a big one. Even though lots of LVP is pretty stable, we still follow the manufacturer’s guidelines for temperature and humidity before installing.
Bad subfloor prep causes most problems. Uneven surfaces stress the joints, and debris under planks makes for visible bumps.
Missing expansion gaps is another issue. We always keep the right perimeter spacing to prevent buckling, especially in bigger rooms or where temps swing.
Which installation method is better for my space: click-lock floating or glue-down?
Click-lock floating systems fit most residential spaces. They go down faster, don’t need much adhesive, and make plank replacement easier.
Glue-down gives a firmer feel and cuts movement in big or high-traffic areas. We use glue-down in commercial setups or wide-open floor plans needing extra stability.
We pick based on room size, subfloor, traffic, and what the manufacturer suggests. Both methods work well if matched to the space.
How do I properly prepare a subfloor to prevent gaps, buckling, or telegraphing?
We check flatness, not just level. Most manufacturers want the subfloor within 3/16 inch over 10 feet.
We grind down high spots and fill low ones with a leveling compound. Clean, dry, structurally sound surfaces are a must before laying planks.
Moisture testing matters, especially over concrete. Too much moisture can weaken glue or mess with stability, even with waterproof flooring.
What should I look for when comparing top brands and product lines?
We compare wear layer thickness, core type, warranty terms, and locking system quality. A strong locking system keeps joints tight over time.
Core construction is key. Rigid core products like SPC or WPC have different density, sound absorption, and comfort levels.
We always read warranty details closely. A longer warranty doesn’t always mean better coverage, so we check for exclusions and installation requirements.
What is the “rule of 3” in flooring, and how does it affect plank layout and staggering?
The “rule of 3” means you should keep at least 6 inches of end-joint spacing between adjacent rows. Ideally, you’ll want to stagger joints across at least three rows.
This approach boosts structural integrity and helps the floor look more balanced. You really don’t want repeating patterns or those awkward “H-joints” where seams line up across rows.
When you stagger joints well, you strengthen the locking system. It also gives the floor a more natural, wood-like appearance, which most people prefer.
Planning the layout ahead of time lets you manage plank lengths at walls and entrances. That way, you avoid those skinny little end pieces nobody likes and get a cleaner finished look.