White Oak Kitchen Cabinets: Timeless Durability and Modern Design Inspiration
If you want kitchen cabinets that feel warm, last long, and match many styles, white oak is a smart choice. White oak cabinets give you durable, easy-to-style storage with a natural grain that works from modern to rustic.
You’ll see how finishes, hardware, and paint pairs change the mood of the wood, and how to pick the right cut and care routine for lasting results. Keep reading to find practical design ideas, budget tips, and simple care steps that help you make confident choices for your kitchen.
Key Takeaways
- White oak offers a durable and versatile cabinet option that fits many design styles.
- Finishes and pairing choices shape the cabinet’s final look and kitchen mood.
- Planning for cost, care, and proper sourcing makes installation smoother.
What Are White Oak Kitchen Cabinets?
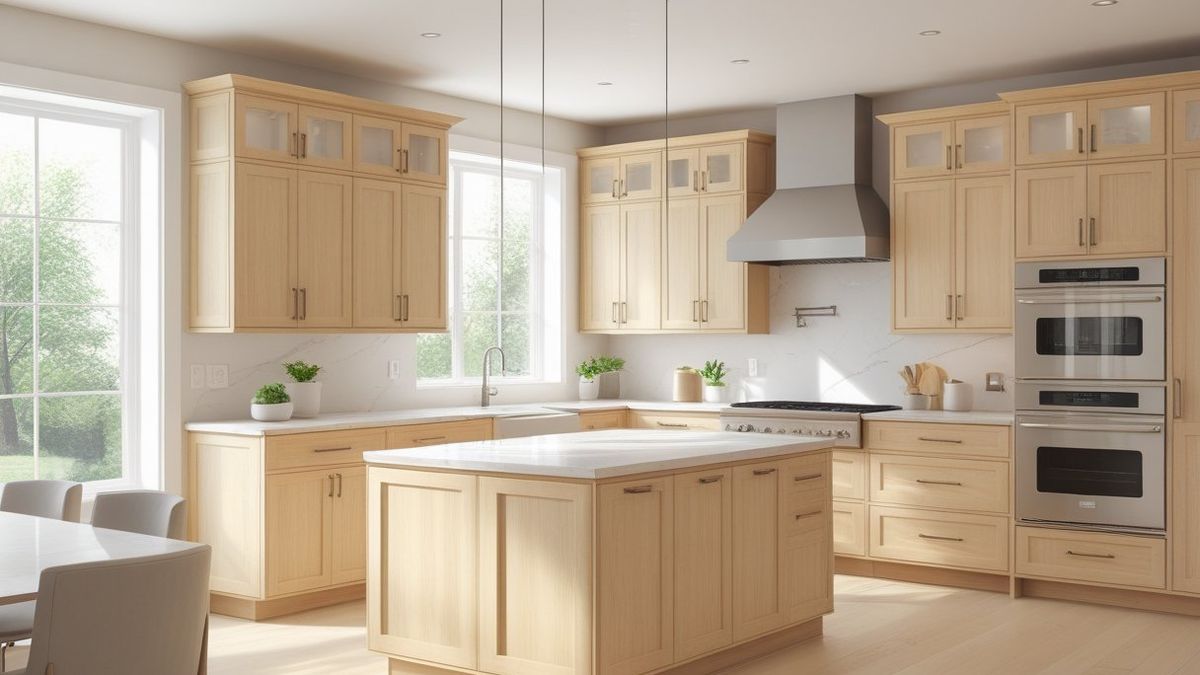
White oak cabinets are built from white oak lumber and come in many styles, finishes, and construction methods. They offer a warm, light-to-medium tan color, strong grain patterns, and good resistance to wear and moisture.
Characteristics of White Oak Wood
White oak has a straight, pronounced grain with a slightly coarse texture you can see and feel. The wood ranges from light tan to warm brown and takes stain evenly, which helps you match existing trim or floors.
White oak is dense and hard, so it resists dents and holds screws and hinges well. It also has natural moisture resistance because of tight grain structure and tyloses, making it a practical choice for kitchen environments.
Expect color change over time; exposure to light can mellow the tone. With regular cleaning and a proper finish, oil, lacquer, or polyurethane, white oak cabinets stay durable and look consistent for years.
Types of White Oak Cabinets
Solid white oak cabinets use thick oak boards for doors and frames. They offer longevity and repairability but cost more and can expand or contract with humidity.
Veneer cabinets use a thin white oak layer over plywood or MDF. You get the oak look with less expense and greater dimensional stability. Veneers allow wider door styles and consistent grain runs across large surfaces.
Painted white oak cabinets combine oak construction with a painted finish. You get oak’s stability underneath and the color flexibility paint provides. There are also mixed-style options, oak doors with painted islands or open shelving, to balance warmth and modern color choices.
Comparison to Other Cabinet Materials
Compared with red oak, white oak shows less orange tone and a more neutral tan. It often looks more contemporary and pairs better with cool metals and stone countertops.
Against maple and birch, white oak has stronger, more visible grain. Maple gives a smoother, cleaner look; birch sits between maple and oak in grain prominence. Choose oak if you want grain presence and texture.
Against engineered options like thermofoil or laminate, white oak offers genuine grain and better repair options. Engineered surfaces resist scratches and cost less, but they cannot be refinished like real wood.
Benefits of White Oak Cabinets
White oak cabinets give you strong, long-lasting performance, a neutral but rich look, and flexible styling options that fit many kitchen designs. You’ll get cabinets that resist wear, look good with many colors and materials, and adapt to both modern and traditional layouts.
Durability and Longevity
White oak ranks high on hardness scales, so your cabinet doors and frames resist dents and scratches better than many other woods. That matters if you have kids, frequent cooking, or heavy daily use.
Its tight grain and natural tannins also help against moisture and decay. In kitchens where steam and spills are common, properly finished white oak holds up without warping. With regular cleaning and occasional refinishing, white oak cabinets can last decades.
If you plan heavy use areas, near sinks, ranges, or busy prep zones, choose solid white oak for box construction or at least oak veneers over stable plywood. That approach gives you structural strength where it matters most.
Timeless Aesthetic Appeal
White oak offers a neutral, warm color range from pale tan to light brown. The straight, pronounced grain adds subtle texture without overwhelming other design elements. You can leave it natural or apply stains that highlight the grain.
The wood’s tones pair well with cool colors like blue or gray and with metal finishes such as brushed nickel, matte black, or brass. That flexibility makes white oak a safe choice if you plan to change countertops, backsplashes, or hardware later.
Because it doesn’t force a single style, white oak ages well in resale markets. Buyers often view it as a quality material, which can help maintain your home’s value when you update finishes thoughtfully.
Versatility in Design Styles
White oak works across many cabinet styles: flat-panel for contemporary kitchens, shaker for transitional looks, and raised panels for traditional rooms. You can stain it, paint it, or whitewash it without losing the grain’s character.
Hardware and finish choices change the mood quickly. Pair white oak with matte black pulls for modern contrast, brass knobs for warmth, or integrated handles for a minimalist feel. You can also mix open shelving and closed cabinets using the same wood for cohesion.
If you want a two-tone scheme, use white oak lower cabinets and painted uppers. That combination keeps durability where you need it while giving visual contrast.
Design Inspirations With White Oak
White oak works with clean lines, warm tones, and durable finishes to shape distinct kitchen looks. You can pair it with bold countertops, muted tiles, or mixed metals to change the mood from sleek to cozy.
Modern White Oak Kitchen Concepts
Use rift-cut or quarter-sawn white oak for a tight, linear grain that feels contemporary. Pair flat-panel cabinets with matte black or brushed brass hardware for strong contrast. Combine a white oak island with a white quartz waterfall countertop to keep the palette light while adding a sculptural focal point.
Keep cabinetry layout minimal: handleless doors or recessed pulls enhance the modern feel. For backsplashes, choose large-format porcelain slabs or a single slab of natural stone to reduce grout lines and visual clutter. Add integrated appliances and undercabinet LED strips for clean sightlines and practical task lighting.
Traditional Kitchen Ideas
Choose full-overlay raised panels or shaker doors in warm white oak stains to emphasize classic details. Add crown molding, framed drawer fronts, and turned legs on an island to create a heritage look. Use warm brass or oil-rubbed bronze hardware to match the wood’s natural warmth.
Layer textures: honed granite or soapstone counters, subway tile with contrasting grout, and a farmhouse sink work well. Open shelving with white oak planks and glass-front cabinets lets you display dishware and add softness. Keep finishes slightly aged to maintain a lived-in, welcoming vibe.
Transitional Styles
Blend modern and traditional by pairing white oak cabinetry with slab doors on lower cabinets and shaker-style uppers. Use neutral paint on walls, soft gray, warm greige, or pale sage, to bridge the styles. Mix metals: stainless appliances with brass accents create balance.
Focus on scale and proportion: a large island with classic corbels but a streamlined range hood keeps the space approachable. Use countertop materials that read modern, like honed quartz, with classic patterned tile on a small backsplash area for visual interest. This mix gives you flexibility to update one element without redoing the whole kitchen.
Finishes and Stains for White Oak
Choose a finish that protects against spills and highlights the grain. Pick a stain tone that fits your light, layout, and how much grain you want to show.
Natural Finishes
Natural finishes keep the wood color close to its original look while sealing the surface. Use water-based clear coats or natural oil finishes like tung or Danish oil to preserve a pale, slightly warm tone. Water-based polyurethane dries fast and resists yellowing, so your white oak stays lighter over time. Oils penetrate and deepen the grain slightly; they add warmth but require periodic re-oiling in high-use kitchens.
Prep matters: sand to a smooth 180-220 grit, remove dust, and test on a scrap piece. Apply thin coats, and use a fine brush or foam applicator to avoid lap marks. For an open-pore wood like white oak, consider a grain filler only if you want a glass-smooth surface.
Light versus Dark Stains
Light stains (e.g., whitewash, pickling, or natural blond) maintain a modern, airy vibe and show oak’s grain without heavy contrast. They suit small or north-facing kitchens because they reflect light and make the space feel larger. Use a pre-stain conditioner or a gel stain to reduce blotching in open-pore white oak.
Dark stains (e.g., walnut, espresso, charcoal) hide small imperfections and create a formal, cozy look. Dark tones increase contrast with cabinets’ grain and hardware. Expect longer drying times and stronger odors with oil-based dark stains. Always test samples under your actual lighting and finish them with a clear topcoat to adjust sheen and durability.
Matte and Gloss Effects
Matte and low-sheen finishes hide scratches and fingerprints better than high gloss. Choose matte or satin if you want a natural, furniture-like appearance that masks daily wear. These sheens work well with textured or wire-brushed oak because they reduce glare and keep grain detail subtle.
High gloss reflects light and makes colors pop, but it also highlights imperfections and requires more upkeep. Use gloss only if you regularly maintain surfaces and prefer a showroom look. For kitchens, a satin or semi-gloss clear topcoat often offers the best balance of durability and appearance.
Pairing White Oak Cabinets With Other Elements
White oak works with cool or warm materials and simple hardware. Choose surfaces and finishes that either highlight the oak’s grain or create clear contrast for a modern look.
Countertops and Backsplashes
Pick countertops that match the mood you want. For a warm, natural look, choose beige or cream quartz, marble with soft veining, or honed limestone. These keep the palette calm and let the oak grain remain the focal point. If you want contrast, use dark soapstone or black granite. Dark stone creates a bold frame around the cabinets and helps islands or lower cabinets stand out.
Backsplashes control texture and shine. Use matte subway tiles in off-white for a subtle backdrop. For more visual interest, choose zellige or hand-glazed tiles in ivory or soft gray to introduce gentle variation without clashing with the wood. Avoid highly patterned backsplashes that fight the oak grain.
Flooring Options
Select flooring that ties the room together without competing with cabinet tones. If your cabinets are light white oak, go for medium-tone oak or warm gray porcelain planks to add depth without matching exactly. This prevents a “floating cabinet” look. For darker white oak finishes, use lighter floors, bleached wood or light limestone, to keep the kitchen bright.
Consider durability and finish. Prefinished engineered wood stands up well to kitchen traffic. Porcelain plank tile offers easy maintenance and can mimic wood while resisting moisture. Keep plank width moderate (4-7 inches) to balance grain scale with cabinet doors.
Hardware Selection
Hardware sets the style and scale of your cabinets. For a modern look, choose slim bar pulls in matte black or brushed nickel. These create clean lines and contrast with the oak grain. For a warmer, traditional feel, choose oil-rubbed bronze or aged brass knobs and cup pulls. Match finish across faucets, lighting, and cabinet hardware for a cohesive look. Pay attention to pull length: 8-12 inch bars fit full-height drawers and islands, while 3/4-1 inch knobs suit upper cabinets. Install pulls horizontally on drawers and vertically on doors for consistent ergonomics.
Caring for White Oak Kitchen Cabinets
Keep surfaces clean, avoid excess moisture, and fix small damage quickly. Use gentle cleaners, protect edges and high-traffic spots, and refinish when finish wears thin.
Cleaning and Maintenance Tips
Start with daily dusting using a soft microfiber cloth to remove grit that can scratch the finish. For routine cleaning, mix a few drops of mild dish soap with warm water, dampen a cloth, then wipe dry immediately. Never soak joints or leave water standing on the wood.
Tackle grease by applying a paste of baking soda and water, gently rubbing along the grain with a soft cloth, then wiping clean. For tougher buildup, use a commercial wood cleaner labeled safe for sealed oak. Test any cleaner on an inconspicuous spot first.
Polish sparingly. Use a high-quality wood polish or a very small amount of mineral oil only when the finish looks dull. Overuse can leave residue and attract dirt. Clean hardware with a separate cloth and mild cleaner to avoid spotting the wood.
Protecting Against Wear
Install felt pads under appliance and cabinet-contact points to prevent scuffs. Use a protective mat or cutting board when working near cabinet faces to avoid knife nicks and heat damage. Keep spills away from edges and seams; wipe them up within minutes.
Control kitchen humidity between 35-55% to reduce cracking or swelling. Avoid placing hot pans or wet dishes directly against cabinet surfaces. Reposition rugs and chairs occasionally to prevent uneven wear and fading from sunlight. Consider UV-filtering window film if cabinets sit in direct sun.
Repair and Restoration
For light scratches, rub a matching-colored wood marker or wax fill stick into the scratch, then buff gently. Deeper gouges may need a wood filler matched to your cabinet stain; apply, sand smooth, and touch up with stain or finish. Work in small test areas first.
When the finish looks worn across large areas, consider a partial or full refinish: strip the old finish, sand to bare wood, apply stain if desired, and seal with a durable clear coat like polyurethane or a water-based conversion varnish. If you prefer less disruption, hire a professional for spray refinishing to keep color consistent and hardware protected.
For hinges and drawer tracks, tighten screws and lubricate metal parts with silicone spray to restore smooth operation. Replace swollen door seals or worn hardware to keep doors aligned and prevent additional stress on the wood.
Cost Considerations for White Oak Cabinets
White oak cabinets cost more than many painted or MDF options, but they offer long-term durability and a distinct grain. Expect prices to vary by construction type, hardware, finish, and labor, and plan your budget accordingly.
Average Pricing
Expect full, solid white oak cabinets to start around $200, $350 per linear foot for stock or basic semi-custom units. Mid-range semi-custom jobs commonly land between $350, $700 per linear foot. High-end, fully custom white oak with specialty joinery or unique veneer matching can exceed $700 per linear foot.
For a typical 10-by-10 kitchen you might budget:
- Basic: $4,000, $7,000
- Mid-range: $7,000, $15,000
- High-end: $15,000+
Prices change with door style, finish, and local labor rates. Get at least three quotes and itemized bids so you can compare door, box, hardware, and finish costs separately.
Factors Influencing Cost
The largest cost drivers are cabinet construction, door type, and finish. Solid white oak doors and full wood boxes cost more than plywood boxes with oak veneer doors. Face-frame versus frameless construction also affects price and style.
Customization raises costs quickly. Things like inset doors, hand-applied stains, live-edge details, or grain-matched panels add labor and material charges. Hardware choice (soft-close hinges, premium pulls) and accessories (pull-outs, lazy susans) add several hundred to several thousand dollars.
Finish type matters: natural oil or hand-rubbed finishes cost more than standard lacquer. Regional supply and demand, plus cabinet maker reputation, also change quotes, so ask for samples and a written finish schedule.
Budgeting for Installation
Factor installation labor separately from cabinet purchase. Typical installation labor runs 20-35% of cabinet material cost, though it can be a flat fee depending on scope. Expect higher labor if you need site modifications, plumbing or electrical work, wall repairs, or floor adjustments.
Get clear line-item estimates for demolition, disposal, deliveries, countertop fitting, and hardware installation. Ask contractors about timeline, warranty, and payment schedule. Keep a contingency of 10-20% of the total cabinet budget to cover unexpected issues like wall out-of-plumb or last-minute design changes.
Sourcing and Installation
Find a maker who matches your budget, timeline, and finish preferences, and plan installation steps that protect your cabinets and home. Know exact measurements, lead times, and who handles countertops, plumbing, and electrical work.
Choosing a Cabinet Maker
Ask for photos of past white oak projects that show door grain, finish, and edge detail. Get three written bids that list cabinet box material (solid wood vs. plywood), door construction (solid white oak, veneer, or engineered), hardware brand, and finish type (natural oil, stain, or lacquer).
Check lead times and production location. Local shops often allow site visits and quicker fixes. National brands may offer warranties and consistent pricing. Confirm finish samples on actual white oak, not maple or alder, because oak absorbs stain differently.
Verify installer pairing and warranty terms. Ask who will handle damage claims, on-site adjustments, and final touch-ups. Put payment milestones and delivery dates in the contract.
Installation Process
Start with a precise field measurement or a certified cabinet template; small errors require costly rework. Have counters, sink, and major appliances on-site or accounted for before cabinet delivery to ensure correct heights and clearances.
Protect floors and leave clear access for installers. Typical install steps: unpack and inspect units; assemble and secure base cabinets to a leveled ledger or directly to studs; install wall cabinets using a strong hanging rail if needed; scribe and trim gaps; fit countertops and backsplashes last.
Plan for trades: plumber and electrician should be ready for sink, garbage disposal, and under-cabinet lighting cutouts the day countertops go in. Keep a short punch-list for final adjustments and confirm warranty paperwork before final payment.